In this series of posts, I’ll be providing tips that show how to do something in both AutoCAD and BricsCAD, hence A & B.
The Series
The idea behind this series is to provide useful information for several sorts of reader:
- AutoCAD users.
- BricsCAD users.
- People in the process of transitioning from AutoCAD to BricsCAD and who need to know what to do differently (if anything).
- People considering transitioning from AutoCAD to BricsCAD and who want to know about the differences and similarities.
Your First Toolbar
If you are using a ribbon-based workspace, you may want to have some toolbars visible, too. There are several reasons you might want to do this. You might want some buttons to be consistently visible, no matter what the ribbon state. Although the QAT in AutoCAD provides some toolbar space, you might want more space than it offers. You might also want toolbar controls that are not available in the QAT; several of them only work in conventional toolbars. You might want the buttons in a different place, such as down one side or on a second screen.
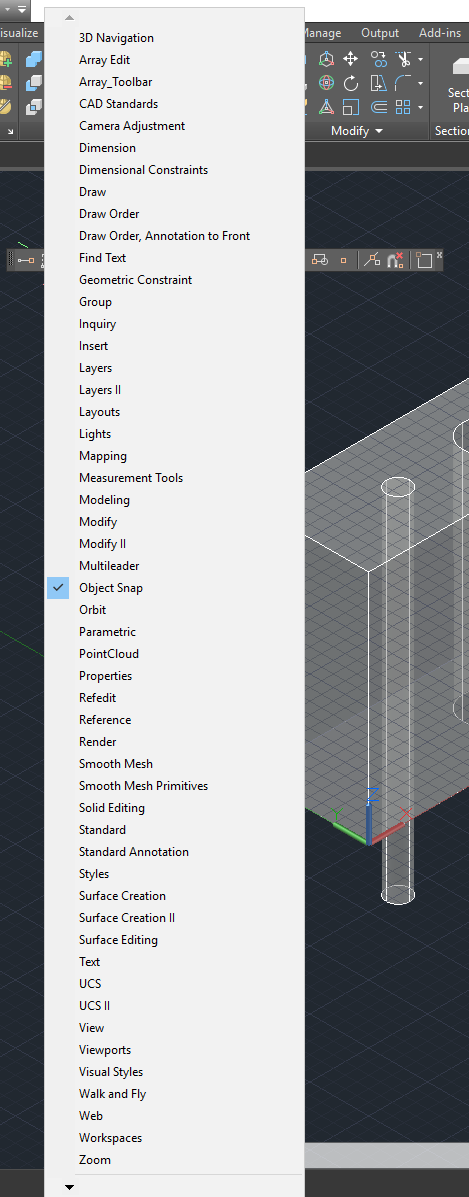
If you have at least one toolbar visible already, things are easy. If you right-click on that toolbar, you will get a menu that allows you to turn on any other toolbar in the same customization group (CUI or CUIx file). Here it is in AutoCAD:
Here’s the equivalent in BricsCAD:
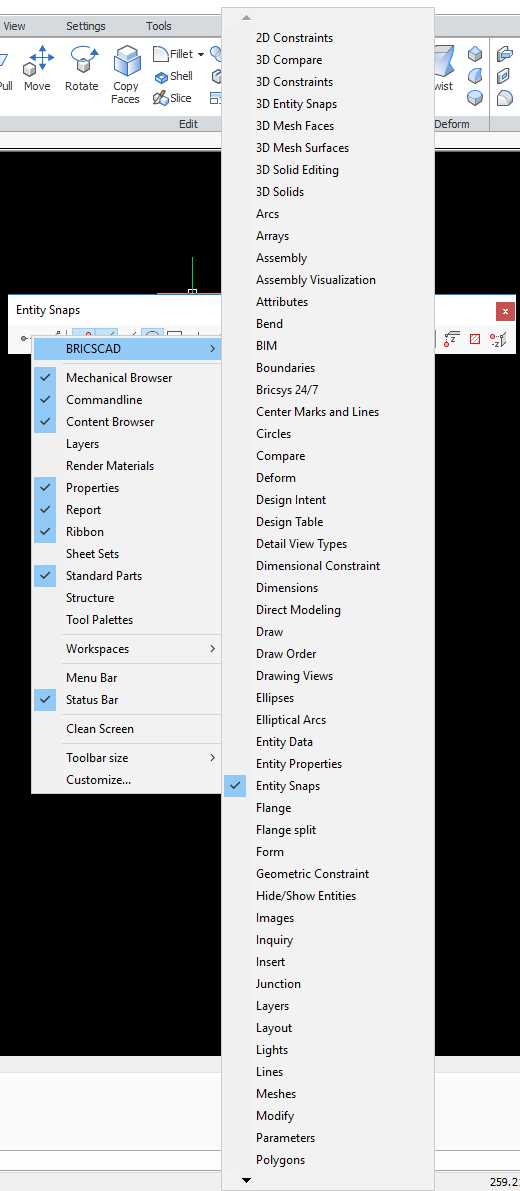
Note that in BricsCAD, the list of toolbars is one level down because the first-level right-click menu in BricsCAD gives you many more interface options.
What if the toolbar you want to turn on is in a different customization group? You can get at those easily enough by right-clicking on any blank (unused) area of a docked toolbar area. AutoCAD:
You can do the same in BricsCAD:
The difference with BricsCAD is that you don’t need to have a docked toolbar with spare space in it to access toolbars in different groups. They’re all available by right-clicking any toolbar button, docked or not.
That’s all easy enough, but what if you don’t have any toolbars visible? You’re stuck in a Catch-22 situation. You need a toolbar to click on to load a toolbar. How do you get that first toolbar loaded?
AutoCAD Interactive Method 1
The first trap to avoid in AutoCAD is using the TOOLBAR command. From Release 13 to AutoCAD 2005, that was useful. With the introduction of CUI files in 2006, the TOOLBAR command became a near-useless cut-down version of the CUI command.

Ignore that. If you’re going to use the CUI interface, use the whole thing. Enter the CUI command. In the top left pane, pick the workspace you want to change:
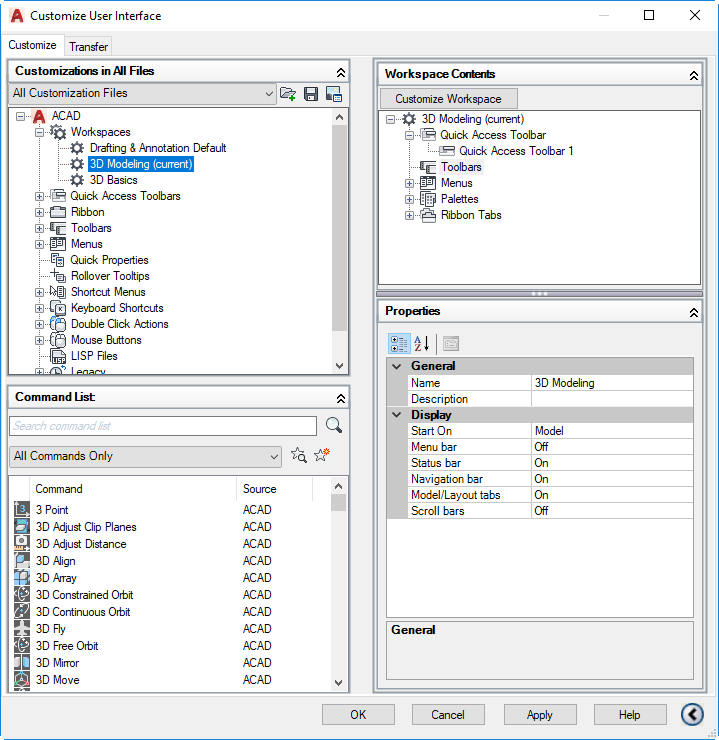
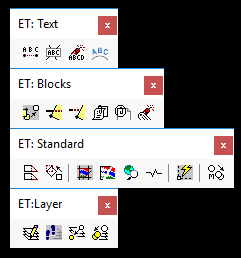
In the top right pane, pick Customize Workspace. In the left pane, expand the Toolbars part of the tree and turn on one of the toolbars:
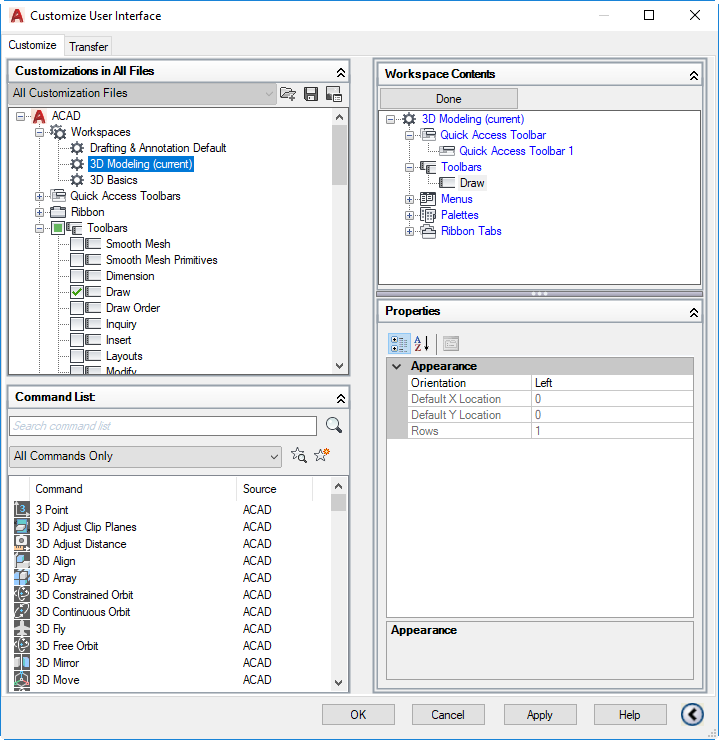
Pick Done (top right) and OK (bottom). Your chosen toolbar will appear.
AutoCAD Interactive Method 2
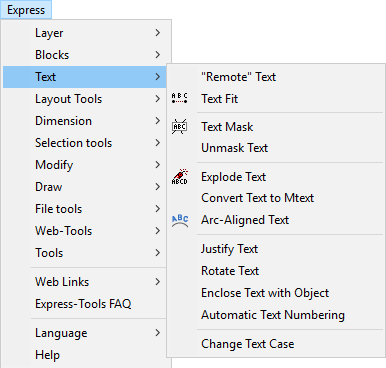
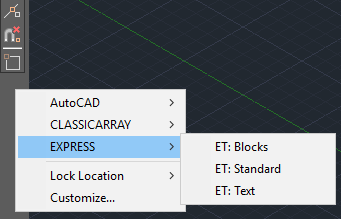
If you have your pull-down menu bar turned on, you can get at the toolbars using the Tools menu as shown here:
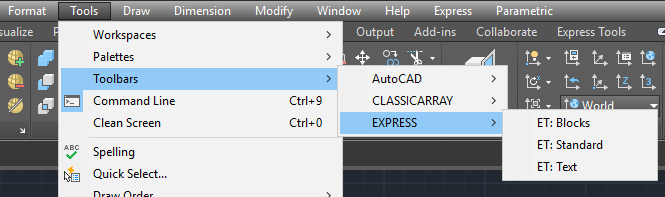
You can turn on your pull-down menu bar by setting MENUBAR to 1.
Thanks to James Maeding for pointing that out.
BricsCAD Interactive Method
In BricsCAD, you can turn on toolbars interactively even if there are none visible, without having to deal with the CUI interface. Just right-click in any part of the ribbon, and you will see the same menu you get when right-clicking a toolbar area. That gives you access to all of the toolbars in all of the groups.
AutoCAD Command Line Method
If you want to use the command line to turn on a toolbar, you need to use the -TOOLBAR command (note the leading hyphen). You also need to know the name of the customization group and what the toolbar itself. One example is the Object_Snap toolbar within the ACAD group. The command line required is therefore:
-TOOLBAR ACAD.Object_Snap Show
To be sure this will work in all environments, I recommend you add the special characters _ and . thus:
_.-TOOLBAR ACAD.Object_Snap _Show
BricsCAD Command Line Method
In BricsCAD, you don’t need the leading hyphen in the TOOLBAR command (although you can use it if you like). The customization group and toolbar names will be different, but the syntax is the same. For example:
TOOLBAR BRICSCAD.TB_EntitySnaps Show
The recommended special characters also do the same job in BricsCAD:
_.-TOOLBAR BRICSCAD.TB_EntitySnaps _Show