In this series of posts, I’ll be providing tips that show how to do something in both AutoCAD and BricsCAD, hence A & B.

The Series
The idea behind this series is to provide useful information for several sorts of reader:
- AutoCAD users.
- BricsCAD users.
- People in the process of transitioning from AutoCAD to BricsCAD and who need to know what to do differently (if anything).
- People considering transitioning from AutoCAD to BricsCAD and who want to know about the differences and similarities.
What area is that polyline?
There are several ways of determining the area enclosed by a polyline. This post goes through the various methods. You will also notice that in each of the methods, you get the length (perimeter) as a bonus.
Spoiler alert: the most efficient methods are at the bottom. There’s a one-click method in AutoCAD (it needs a little setting up first) and a zero-click method in BricsCAD.
LIST command in AutoCAD
The oldest method is the good old LIST command. Although this has been around for ever, here’s how it works in recent AutoCAD releases. Issue the LIST command, select the polyline, press Enter to finish the selection, and above your floating command line AutoCAD will show something like this:
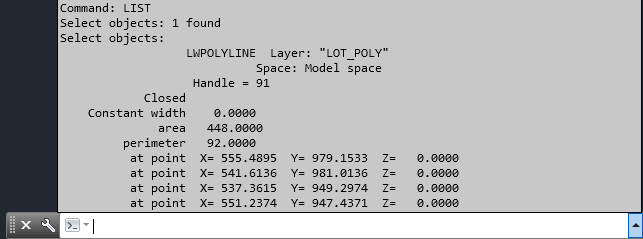
If this display goes away and you want to see it again, hit F2 and it will return. If you have a docked command line, AutoCAD will display the information on the text screen, which it will then display:
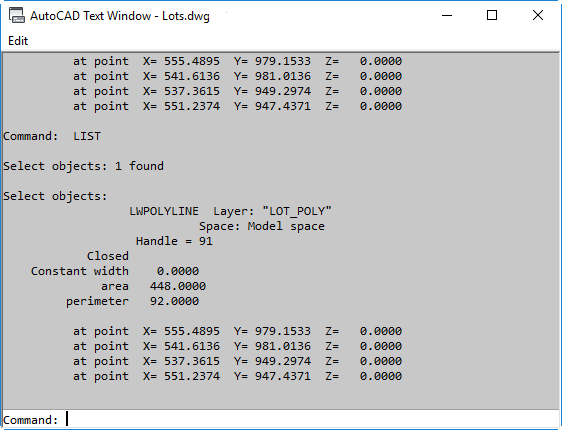
If you have a floating command line but want to see the text screen rather than the over-the-command-line popup, you can switch to it using Ctrl+F2.
LIST command in BricsCAD
The command works in just the same way in BricsCAD as it does in AutoCAD with the docked command line.. The main differences are that the BricsCAD default interface has a docked command line, and that the text screen (called Prompt History in BricsCAD) is displayed even when using a floating command line.
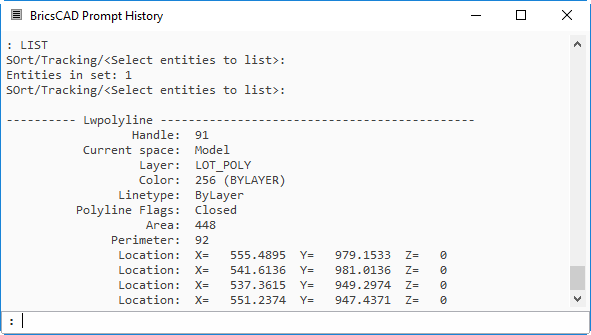
If the text screen goes away or is obscured, you can restore it using the familiar-to-AutoCAD-oldtimers keystroke of F2 (not Ctrl+F2, which toggles the ribbon in BricsCAD).
Unit precision in BricsCAD
Another difference you might notice is that the only whole units are displayed. This is because BricsCAD respects the setting of DIMZIN when displaying values in the AREA command and AutoCAD doesn’t. In this drawing, DIMZIN is set to 8, which suppresses trailing zeroes. Because the area is exactly 448.0, BricsCAD displays it as 448. If DIMZIN is not set to suppress trailing zeroes, this doesn’t happen. If DIMZIN is set to 0, BricsCAD displays the area using the setting for linear units precision, LUPREC. If this is 4, the LIST command will display the area as 448.0000, as it does in AutoCAD.
This respect for DIMZIN applies in other places in BricsCAD too. For the remainder of this post I’ll have DIMZIN set to 0.
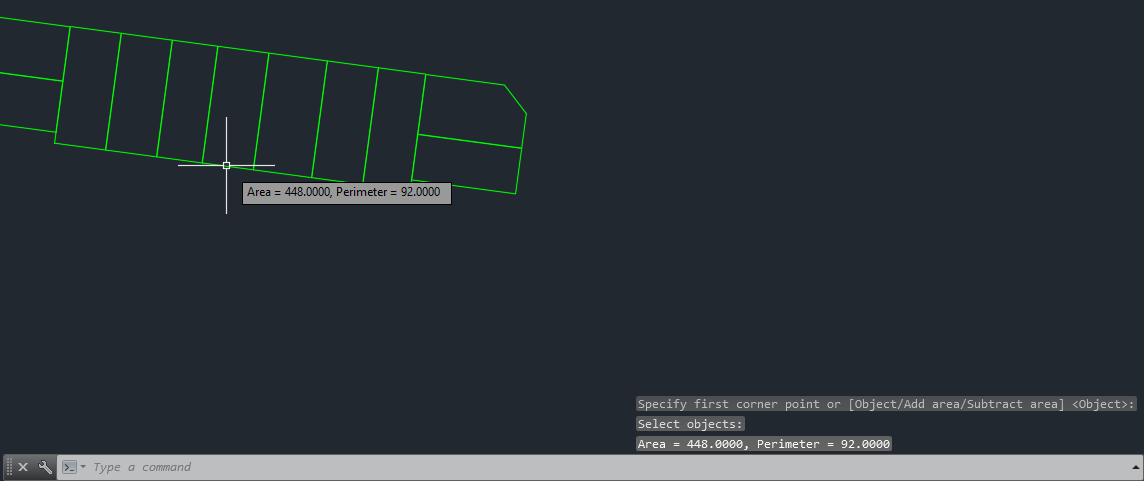
AREA command in AutoCAD
Another good old method is the AREA command. Issue the command, use the Object option and pick your polyline. You will be shown the area in two places as shown here:
AREA command in BricsCAD
The AREA command works similarly in BricsCAD. Although the options displayed indicate that the subcommand is Entity rather than Object, you can in fact use either E or O to initiate selection of an object. Unlike AutoCAD, the area is displayed in one place only, the command prompt area:

Note that the AREA command in both applications gives you more options, including adding together several areas.
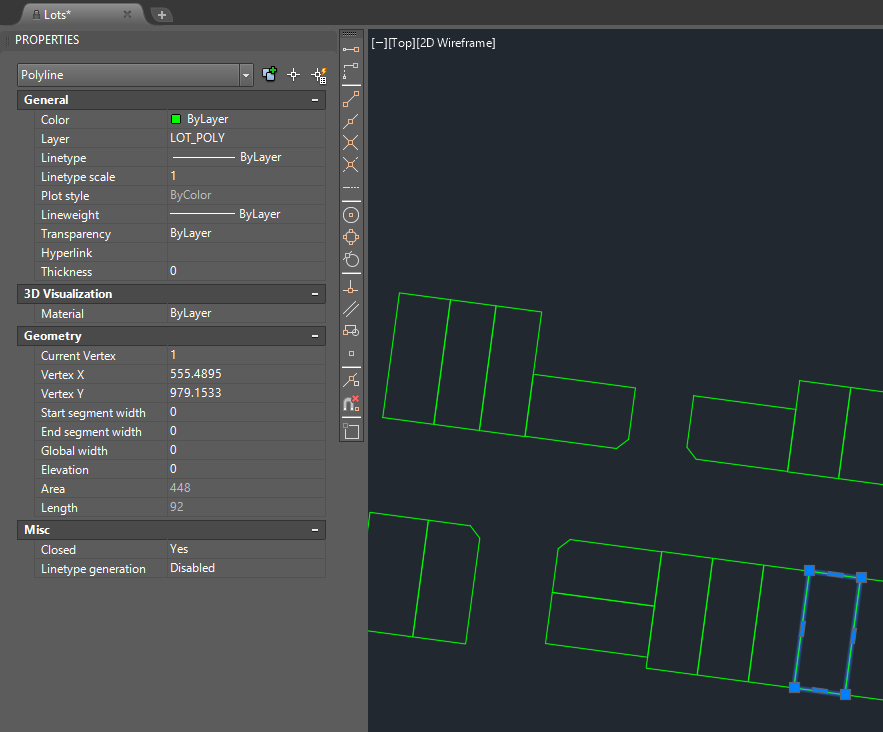
Properties palette in AutoCAD
If you have the Properties palette visible (Ctrl+1 will toggle it on), you can simply select the polyline and the area will be displayed in the palette, thus:
Note that unlike the AutoCAD AREA command, the Properties palette does respect the value of DIMZIN. To display the trailing zeroes, first set DIMZIN to 0.
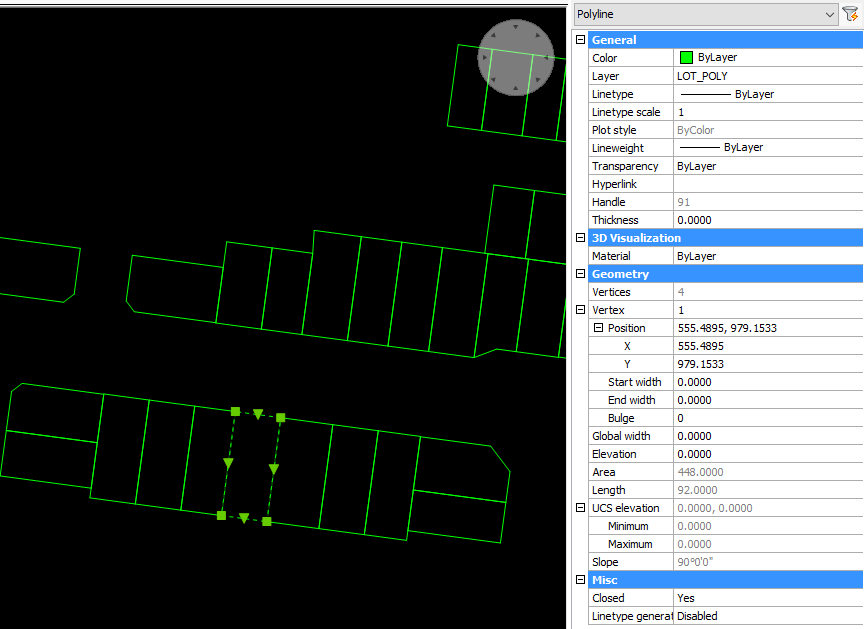
Properties palette in BricsAD
Using the Properties palette in BricsCAD is identical to AutoCAD. Here’s the display:
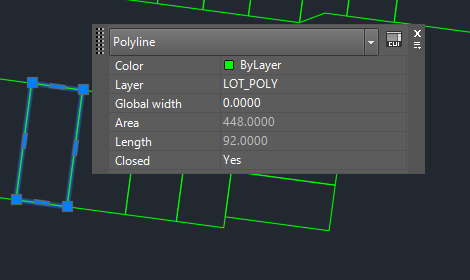
Quick Properties in AutoCAD
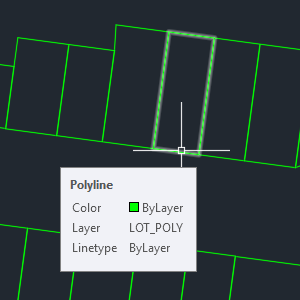
Quick Properties is a cursor-based cut-down version of the Properties palette. It’s not what you get when hovering, which is this:
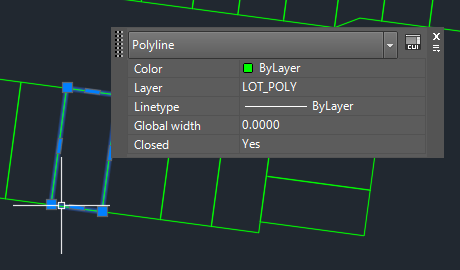
What you want is Quick Properties, which you only get when you select an object, for example:
Unfortunately, Area is missing. It was there once upon a time, but there were performance problems so it was removed by default. However, you can add it back in. Invoke CUI and pick Quick Properties on the left. Scroll down on the right and pick Polyline.
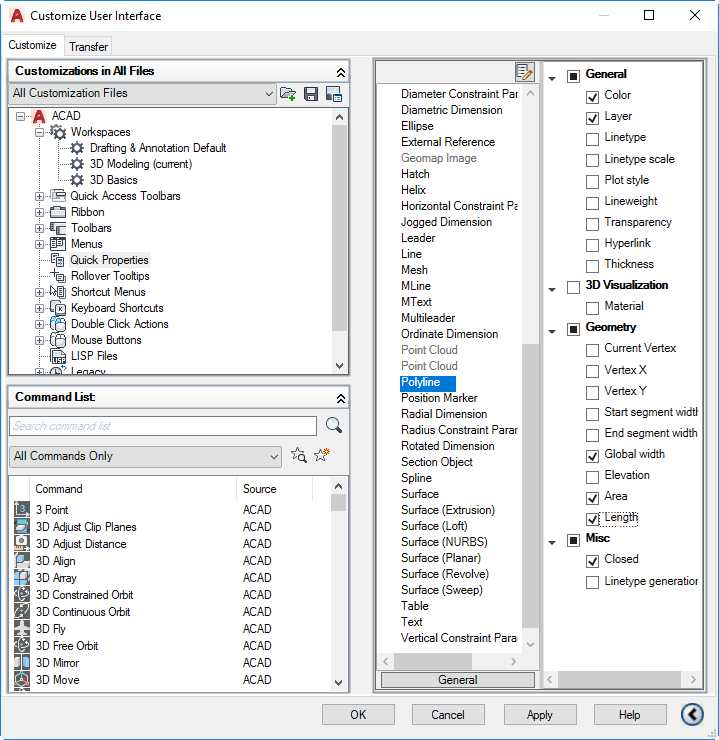
Turn on Area (and Length if you want). Pick OK. Now see what happens when you select a polyline:
Note: in AutoCAD 2014 (and maybe others), the Area option was missing. There’s a workaround, but it’s a complex hack and well beyond the scope of this post.
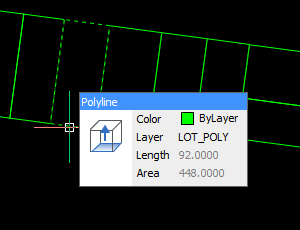
Quad cursor in BricsCAD
The easiest way to find a polyline area in BricsCAD is just to hover over it. The Quad cursor will appear, giving you the information you need:
Alternatives
If you’re doing this regularly, it makes sense to automate it as much as possible. Depending what you want, menu macros might help. There are also various free LISP routines around that do this sort of thing, for example these by Lee Mac. If you have more specific requirements (e.g. automatic area label, export to CSV), then that’s the sort of thing I do for a living so feel free to get in touch.
Good article, being new to ACAD I wasn’t aware of the Area command before now so thanks. It’s also interesting to see how comparable BricsCAD is to ACAD.
The engineer I work with wanted areas added to plans specifically in Metres squared with a precision of 1 decimal place.
To accommodate this I use a LISP called A2A Area 2 Attribute for which I have created a block which displays the result. The benefit of this I have found is quickly summing several areas and having the result stored on screen. It’s a bit rough but does the job, if you want the block I’m happy to share.
Thanks Amy, I’ve done similar things for my clients.